Improving Accessibility: Voice Control
Having improved an app for VoiceOver means you’ll have made some major steps to also support its sibling: Voice Control.
Whereas VoiceOver is a screen reader, reading what’s on the screen, Voice Control lets users navigate their devices by voice.
In this post, we’ll look at Voice Control, how it works, and how you can make improvements to your app to make the Voice Control experience even better.
- Getting Started With Accessibility: VoiceOver
- Improving Accessibility: VoiceOver
- Verifying VoiceOver: Accessibility Inspector
- Improving Accessibility: Voice Control (this post)
- Getting Started With Accessibility: Dynamic Type
Introduction
Apple announced Voice Control for iOS and macOS at WWDC in 2019; the video below gives a great understanding of what Voice Control can do.

This is so cool! As you may have noticed, Voice Control definitely builds on top of accessibility labels to activate certain controls, like share buttons and more.
While macOS lacks some functionality in Voice Control compared to iOS, where we can show labels for elements, proper Voice Control-friendly labels are crucial for a great Voice Control experience on iOS.
Voice Control on iOS
Take a look at how to use Voice Control on iOS:
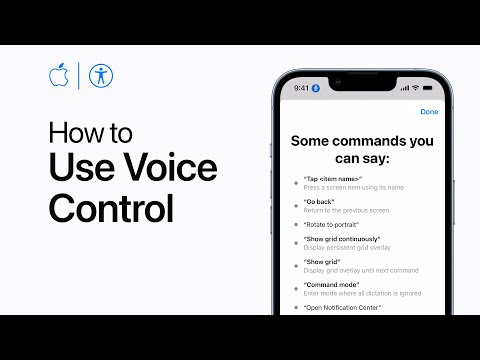
You’ll notice that commands like “Go back” or “Swipe left” are something we can make work as expected with the existing accessibility APIs that are also leveraged by VoiceOver.
And even more so than with VoiceOver, having succinct labels to use makes or breaks your Voice Control experience. Consider the following example:
Tap Outdoor Walk 2.13km today
// vs
Tap Outdoor Walk
// When there are multiple elements with the same name, iOS will overlay
// numbers for the matching elements.
Tap 2
Furthermore, you may want to provide multiple labels that can trigger Voice Control. Imagine a settings button in your app is indicated with a cog. You can make sure users can activate it with all of the following:
Tap Settings
Tap Cog
Tap Preferences
Tap Prefs
Tap Gear
To do so (and also improving your app for Full Keyboard Access’s Find),
look no further than accessibilityUserInputLabels:
Use this property when the
accessibilityLabelisn’t appropriate for dictated or typed input. For example, an element that contains additional descriptive information in itsaccessibilityLabelcan return a more concise label. The primary label is first in the array, optionally followed by alternative labels in descending order of importance.
For the aforementioned settings button, we can do the following:
settingsButton.accessibilityUserInputLabels = [
    NSLocalizedString("Settings", comment: ""),
    NSLocalizedString("Preferences", comment: ""),
    NSLocalizedString("Prefs", comment: ""),
    NSLocalizedString("Gear", comment: ""),
    NSLocalizedString("Cog", comment: "")
]
Et voilà; any of these inputs will now be supported to either speak (with Voice Control) or to find the element (with Full Keyboard Access).
Further Reading
Kristina Fox wrote a great blog post on Voice Control back in 2019, which I’d highly encourage you to check out. It gives a great example on how to make those small tweaks to make Voice Control easier to use, and gives a great overview of the idea with example images, too!
Conclusion
Supporting VoiceOver lays groundwork for other assistive technologies, like Voice Control. With limited changes, we can build upon our accessibility work to branch out to other assistive technologies and make our apps even more accessible.
Let me know your thoughts on this post, and if you have any questions, I’d love to help!
- Getting Started With Accessibility: VoiceOver
- Improving Accessibility: VoiceOver
- Verifying VoiceOver: Accessibility Inspector
- Improving Accessibility: Voice Control (this post)
- Getting Started With Accessibility: Dynamic Type